

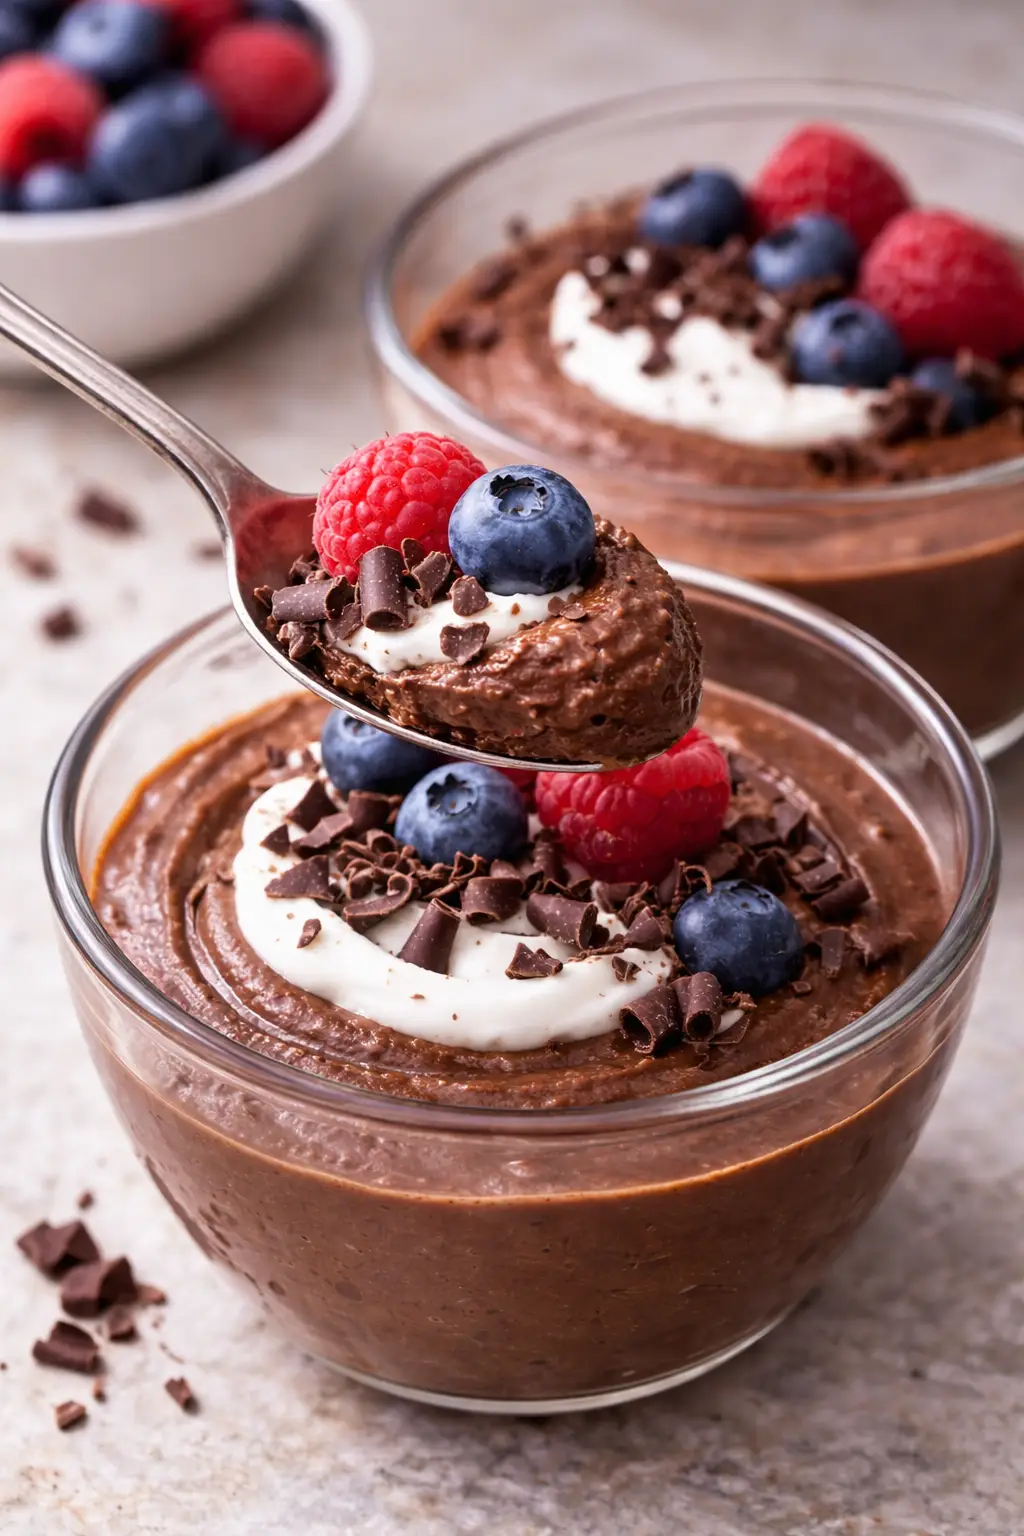
Silky, rich, and surprisingly wholesome, this dairy-free chocolate mousse with chickpeas is the kind of dessert that feels indulgent while still being incredibly simple and nourishing. Chickpeas might sound unusual in a dessert, but they blend into a smooth, creamy base that perfectly carries deep cocoa flavor without the need for dairy or eggs. With just a handful of pantry ingredients and a blender, you can create a luscious vegan chocolate mousse that’s naturally high in protein and wonderfully satisfying. Whether you’re looking for a healthier dessert, a quick plant-based treat, or an allergy-friendly chocolate fix, this easy mousse delivers pure chocolate comfort in every spoonful.
Why You Will Love This Recipe:
Honestly, I adore how this chocolate mousse eliminates the fuss. Not only is it totally plant-based, but the preparation also keeps cleanup to a bare minimum! The airy, chocolatey flavor is every bit as satisfying as the classic dessert, yet you can serve it without worrying about allergies or heavy cream. If you’ve ever wished you could eat chocolate mousse guilt-free and share it with everyone, this chickpea twist will be your new favorite. The deep chocolate taste, smooth texture, and sheer ease of tossing everything into a blender make it almost too good to be true. But yes, it’s that simple!
Ingredients
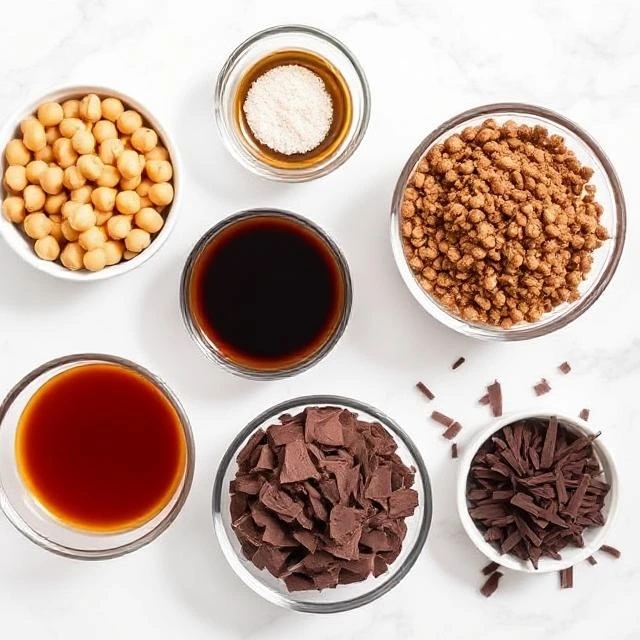
- 1 can (15 oz) chickpeas (drained and rinsed), or 1.5 cups cooked
- 1/2 cup unsweetened cocoa powder
- 4-6 tablespoons maple syrup (to taste)
- 2 teaspoons vanilla extract
- 1/4 teaspoon sea salt
- 1/3 cup dairy-free milk (almond, oat, or soy work best)
- 2 tablespoons melted coconut oil (optional, for extra richness)
- Dairy-free chocolate shavings or berries, for garnish
How to Make the Best Chocolate Mousse (Step-by-Step)
Step 1: Prep the Chickpeas
First, drain and rinse your chickpeas thoroughly. This step is crucial because it helps remove the “beany” flavor. As you get the chickpeas ready, imagine the creamy chocolate mousse magic already beginning in your kitchen.


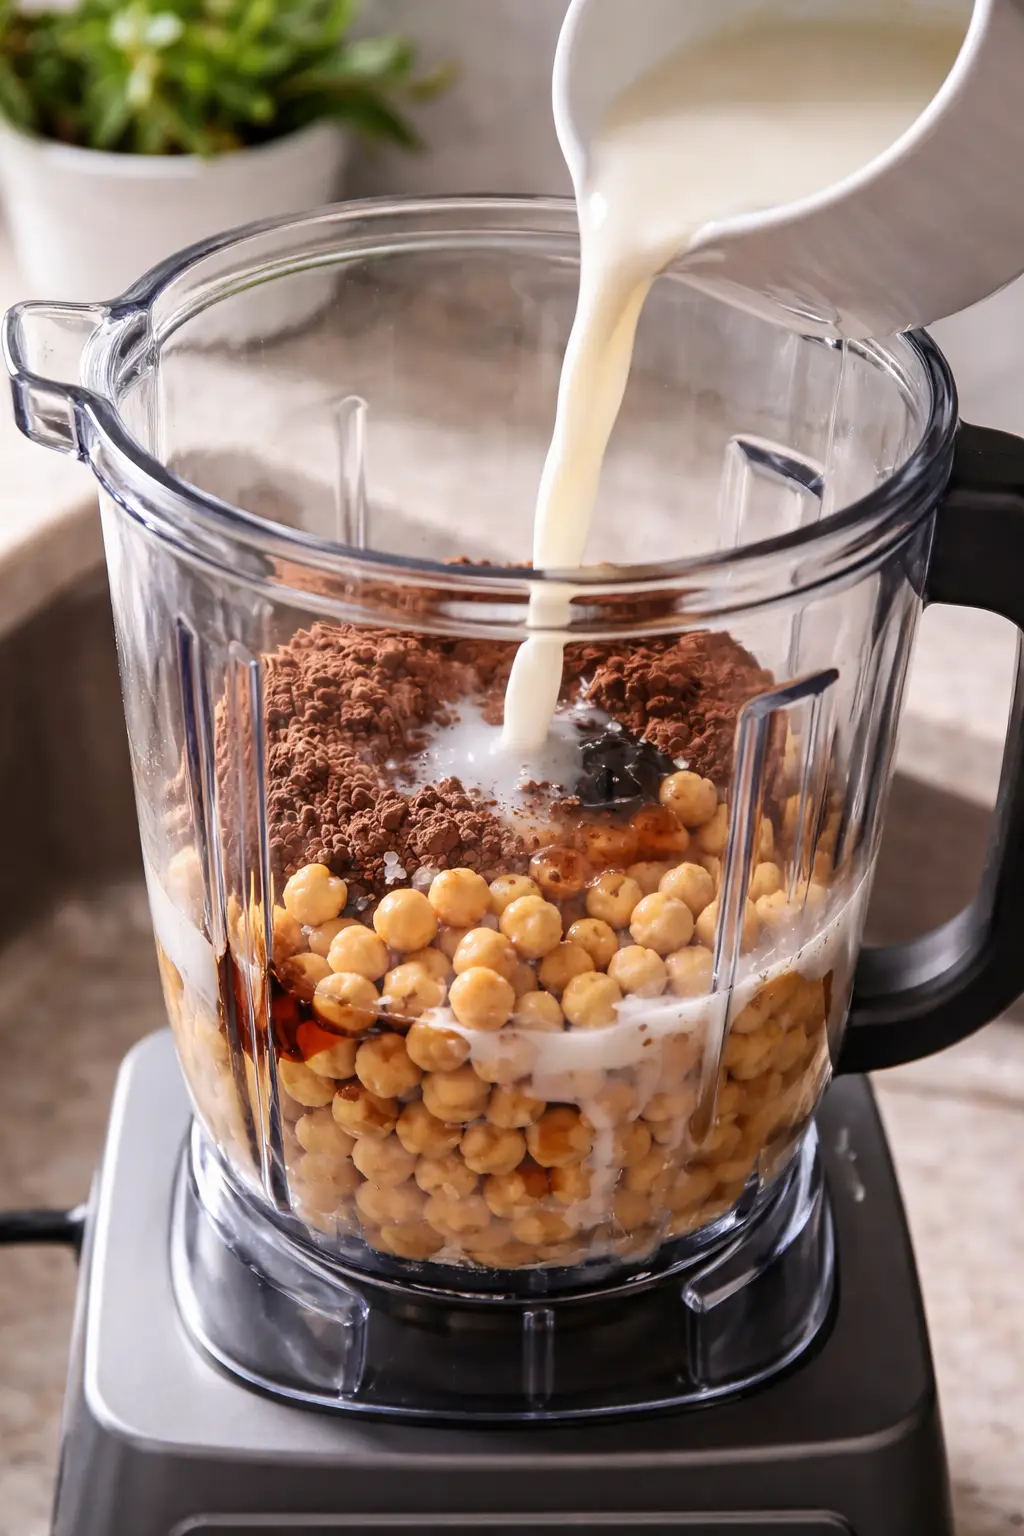
Step 2: Blend it All Together
Next, place the chickpeas, cocoa powder, maple syrup, vanilla, sea salt, and dairy-free milk in a high-speed blender or food processor. If you want a little extra richness, add in the melted coconut oil. Blend until very smooth—pause a few times to scrape down the sides so every bit gets silky and lush.
Step 3: Taste and Adjust
Taste your chocolate mousse base. Would you like it sweeter? Add a touch more maple syrup, one tablespoon at a time, blending between additions. For a deeper cocoa punch, sprinkle in an extra teaspoon of cocoa powder if you wish.
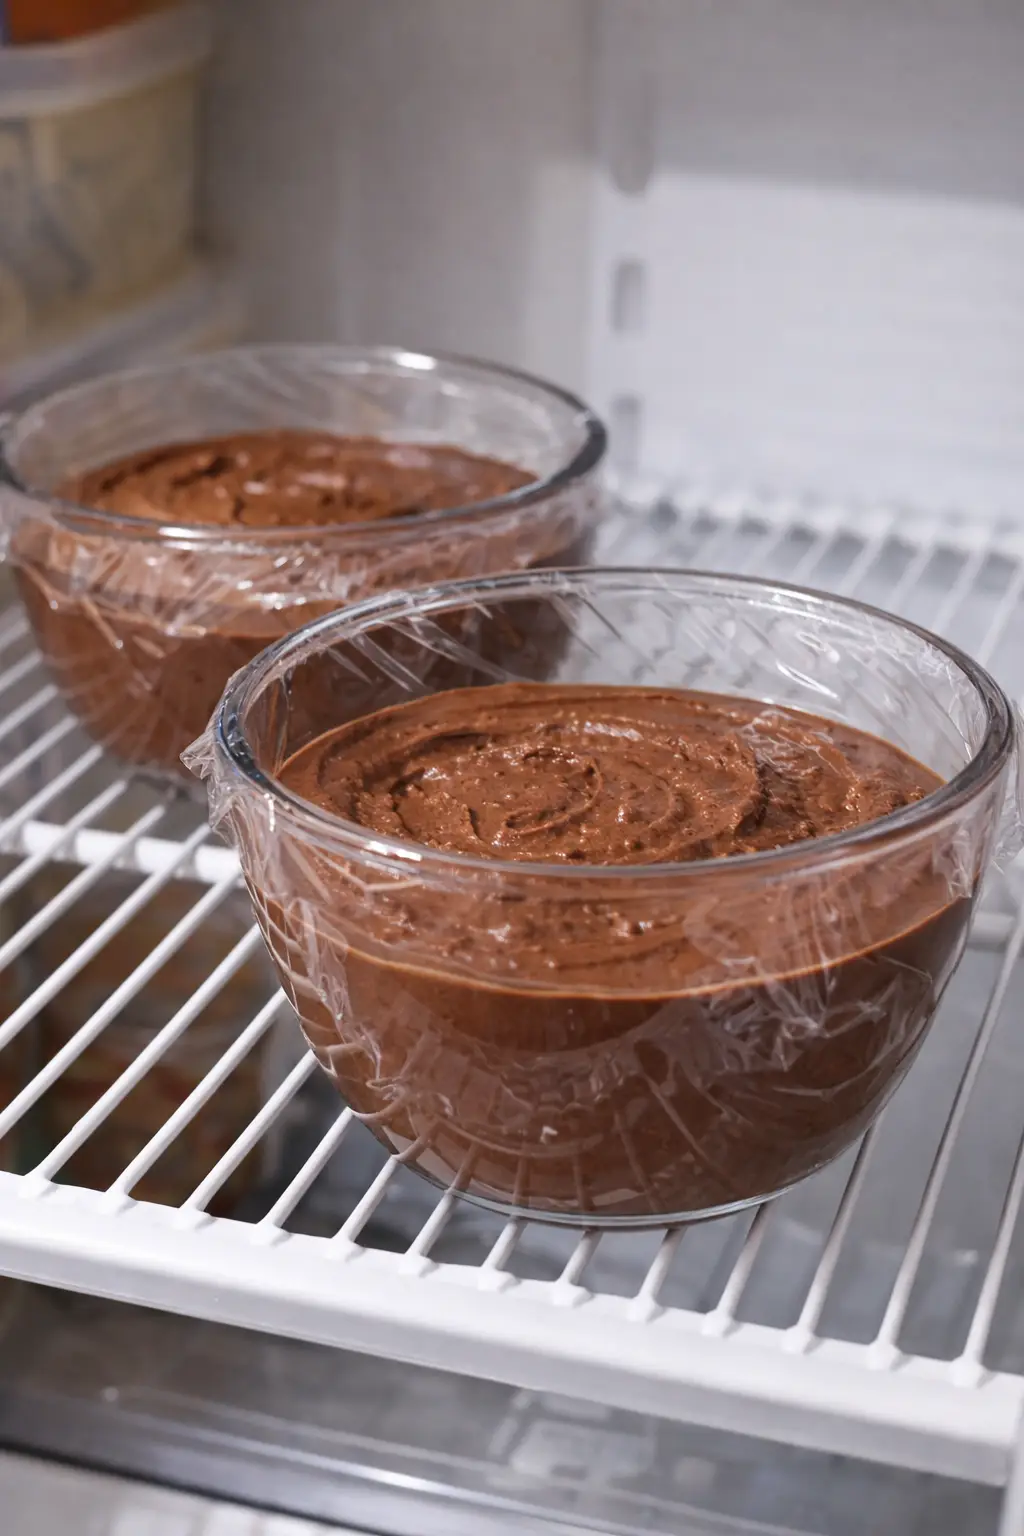
Step 4: Chill the Chocolate Mousse
Once your mousse is completely blended and smooth, scoop it into serving glasses or bowls. Cover and chill in the fridge for at least 2 hours. This rest time is important! The chocolate mousse thickens and the flavors deepen, leaving you with an impossibly creamy, luscious treat.
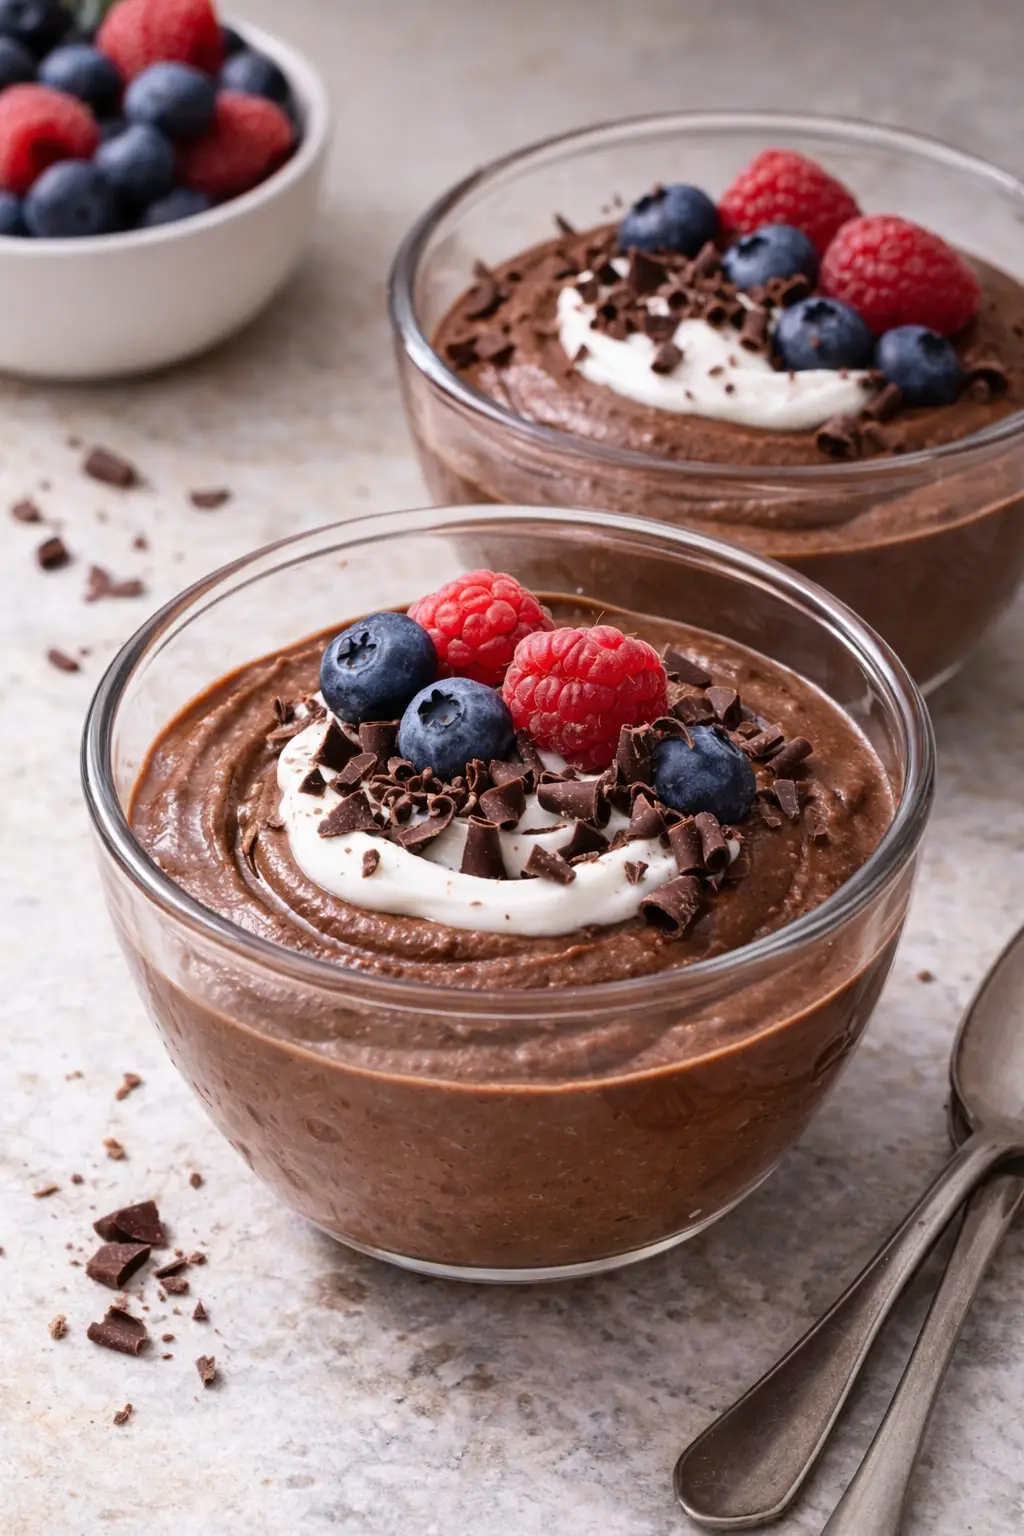
Step 5: Garnish and Serve
Just before serving, add your favorite toppings. I love a sprinkle of dairy-free chocolate shavings, a swirl of coconut yogurt, or a handful of fresh berries. Every bite is silky, chocolatey, and utterly satisfying.
Expert Tips
Keeping things simple is always best, but here are a few tricks to take your chocolate mousse up a notch:
- Use chilled chickpeas for a quicker set and fresher flavor.
- For a fluffier texture, pulse an extra splash of dairy-free milk in at the end.
- Always blend until the mousse is completely smooth—graininess is the enemy!
- A dusting of espresso powder intensifies the chocolate flavor beautifully.
- Don’t forget: chilling is key to letting the flavors meld and the mousse to set.
Recipe Variations
Craving a new spin on this classic treat? Try these fun twists:
- Mocha Chocolate Mousse: Replace 2 tablespoons of milk with strong espresso.
- Peanut Butter Swirl: Gently fold in 2 tablespoons natural peanut butter after blending.
- Spicy Aztec Style: Add a pinch of cayenne and cinnamon to the mix—it’s a taste adventure!
- Mint Chocolate Mousse: Blend in a few drops of peppermint extract for a cool, refreshing finish.
Storage and Reheating Tips
Chocolate mousse can be made ahead! Store in an airtight container in the fridge for up to 3 days. For best results, add toppings just before serving. Freezing isn’t recommended, as it may affect the creamy, fluffy texture.
Serving Suggestions for Chocolate Mousse
This mousse is delicious as is but also superb:
- Layered with berries and granola for a parfait—we all need a reason to eat mousse for breakfast, right?
- As a surprisingly rich cake or cupcake frosting.
- Dolloped over warm waffles or pancakes on a special morning.
Conclusion
This dairy free chocolate mousse with chickpeas proves that a simple, wholesome ingredient can transform into a rich and satisfying dessert. With its silky texture, deep chocolate flavor, and easy blender preparation, this treat is perfect for anyone looking for a healthier indulgence. Whether you’re craving a quick sweet fix or planning a plant-based dessert, this vegan chocolate mousse made with chickpeas is both nourishing and delicious. Give this easy dairy free chocolate mousse recipe a try, and you might just discover your new favorite guilt-free chocolate dessert. 🍫
Dairy-Free Chocolate Mousse with Chickpea Magic
Description
Discover a rich, dairy-free chocolate mousse made with chickpeas for creamy texture. This easy, allergy-friendly dessert offers a healthier twist on classic chocolate indulgence while staying simple, delicious, and satisfying.
Ingredients

Instructions
Prepare the Chickpeas
-
Drain and Rinse
Start by draining and rinsing the chickpeas thoroughly under cold water.
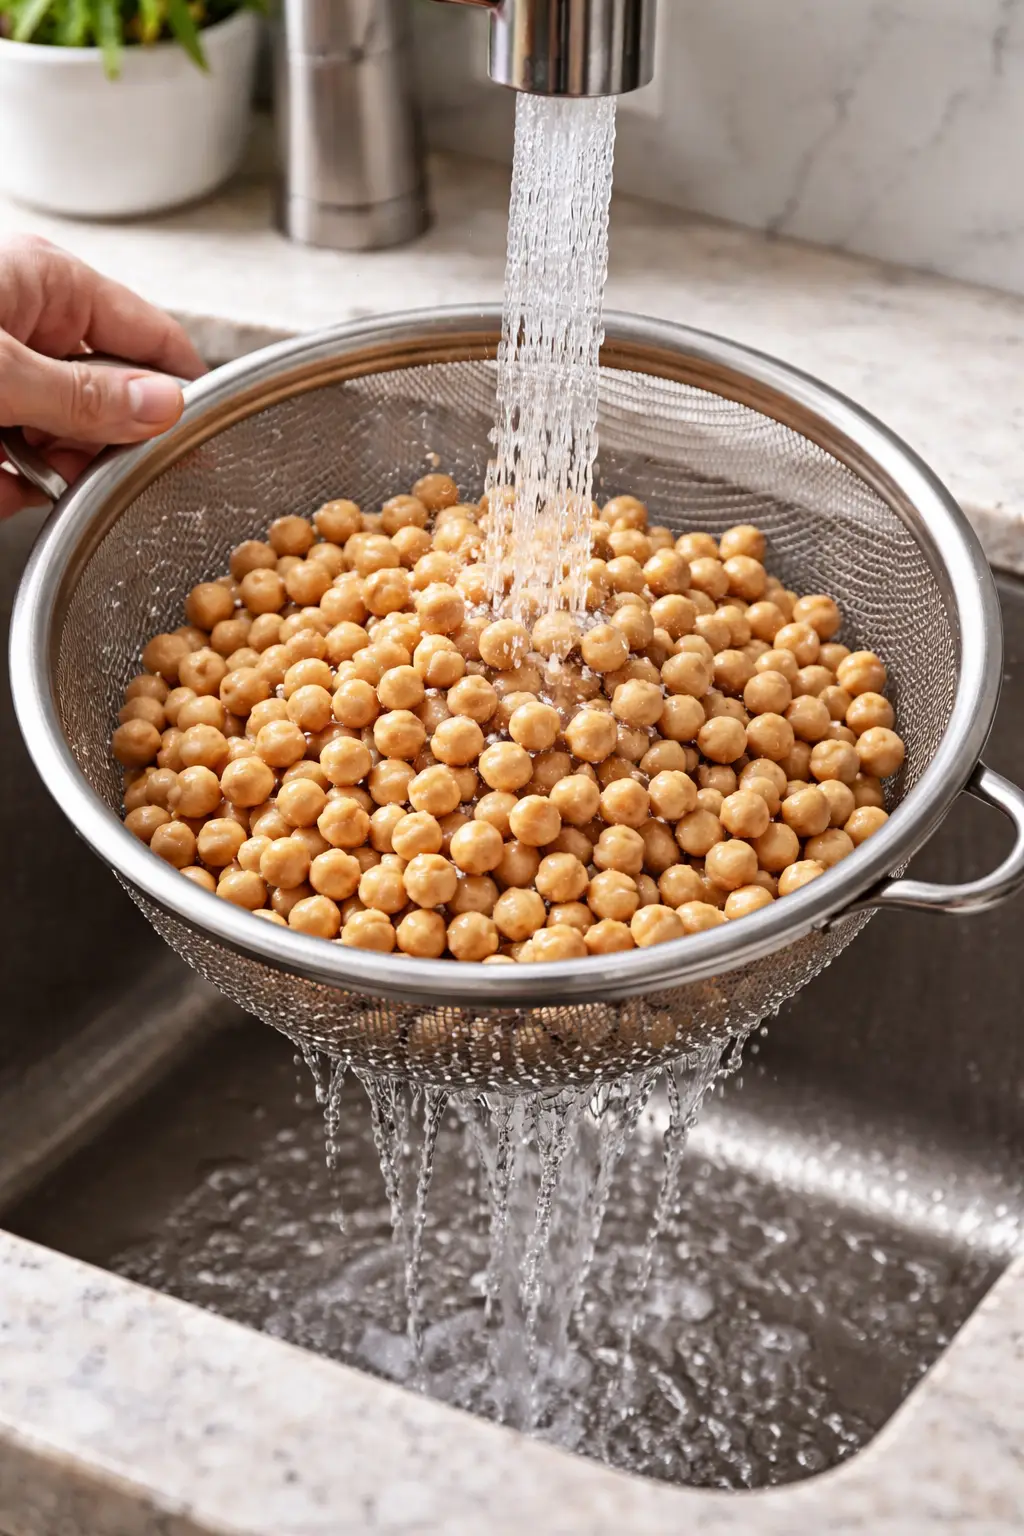 Rinsing removes the natural “beany” flavor and helps create a smoother, cleaner chocolate taste in the mousse.
Blend the Mousse Base
-
Combine Ingredients
Add the following ingredients to a high-speed blender or food processor:
-
Chickpeas
-
Unsweetened cocoa powder
-
Maple syrup
-
Vanilla extract
-
Sea salt
-
Dairy-free milk
If you want extra richness, add the melted coconut oil as well.
Blend until the mixture becomes very smooth and creamy.
 Pause occasionally to scrape down the sides of the blender so everything blends evenly into a silky mousse.
 -
Adjust the Flavor
-
Taste and Balance
Taste the mousse after blending.
-
If you prefer it sweeter, add more maple syrup 1 tablespoon at a time, blending between additions.
-
For a deeper chocolate flavor, add an extra teaspoon of cocoa powder.
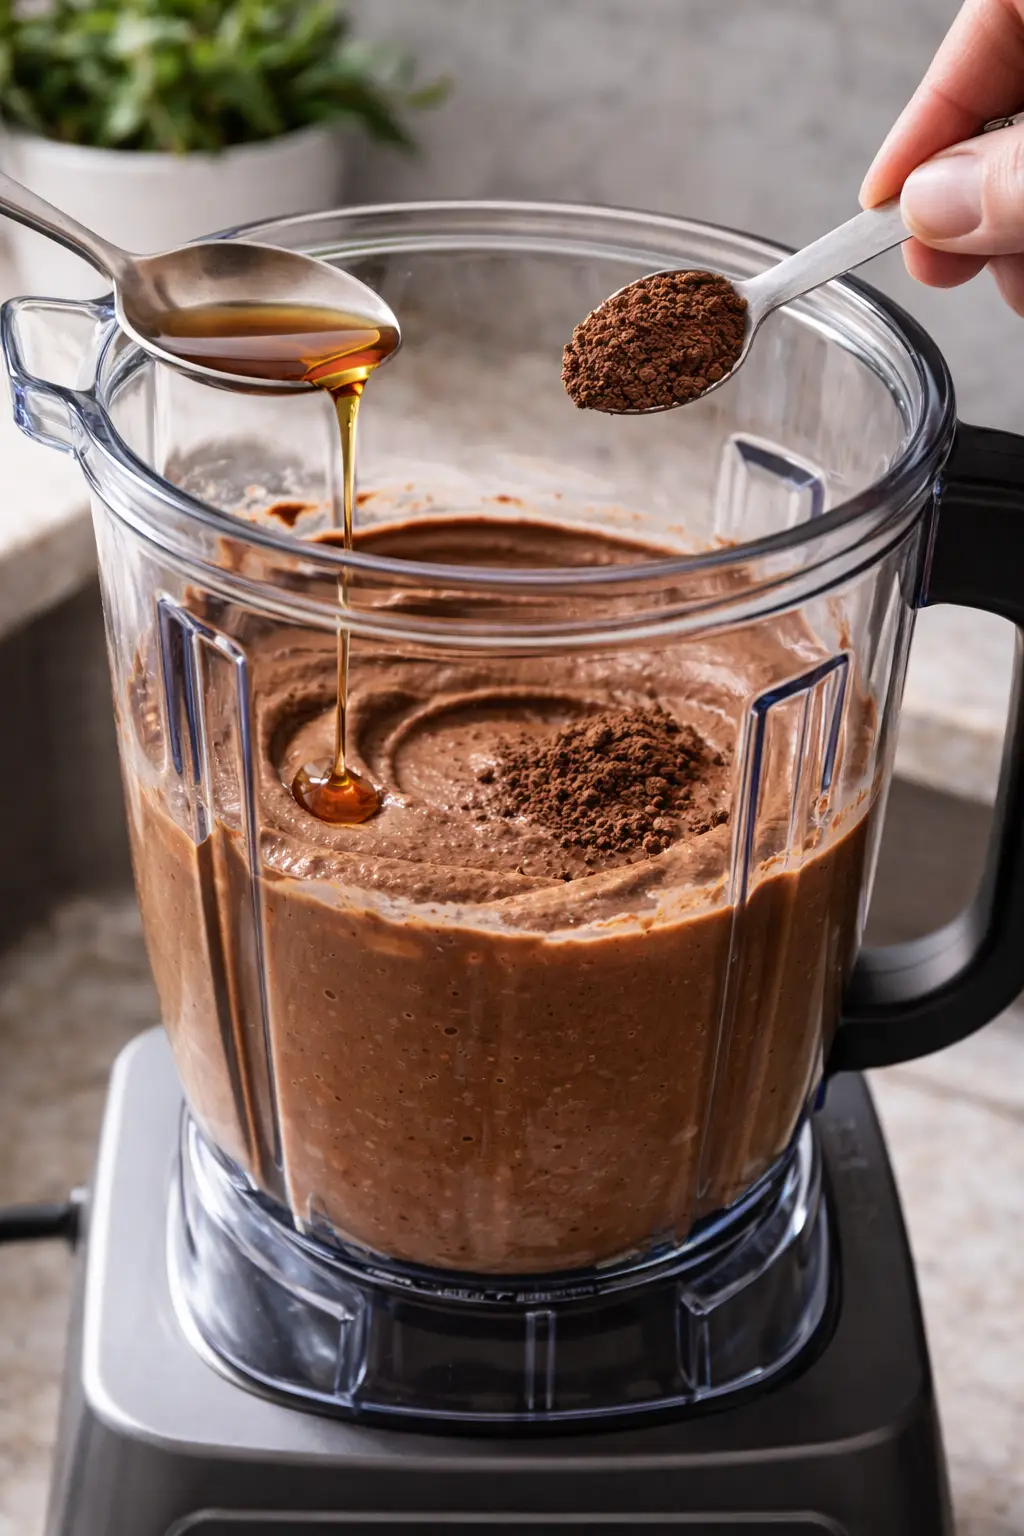 Small adjustments can make a big difference in the final flavor.
 -
Chill the Chocolate Mousse
-
Let It Set
Spoon the blended mousse into serving glasses or bowls.
Cover and place them in the refrigerator for at least 2 hours.
 Chilling allows the mousse to thicken and develop a richer chocolate flavor, creating a smooth and creamy texture.
Garnish and Serve
-
Add Final Toppings
Just before serving, garnish with your favorite toppings such as:
Dairy-free chocolate shavings
Fresh berries
A swirl of coconut yogurt
Serve chilled and enjoy a silky, rich dairy-free chocolate mousse.

Nutrition Facts
Servings 4
- Amount Per Serving
- Calories 210kcal
- % Daily Value *
- Total Fat 4g7%
- Saturated Fat 1.5g8%
- Total Carbohydrate 37g13%
- Dietary Fiber 6g24%
- Sugars 11g
- Protein 7g15%
- Vitamin C 1 mg
- Calcium 55 mg
- Iron 2 mg
* Percent Daily Values are based on a 2,000 calorie diet. Your daily value may be higher or lower depending on your calorie needs.
Note
Use good-quality cocoa powder for the best chocolate flavor.
Adjust the thickness of your mousse by adding more or less dairy-free milk.
If you’re sensitive to coconut, use a neutral oil or skip it altogether—it’s just for creaminess.